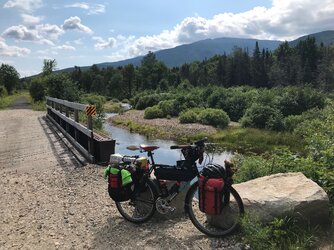
I'm posting this guide with the hopes that those reading it will give me input to make it better and point out flaws and gaps in the guide. Please see the first reply for more info!
What is Bike Touring?
Bike punk is just the clever name we’ve given to bike culture as it relates to the punk rock community. Bike punk usually results in ‘mutant bikes’ put together by anarchistic welders, games like ‘bike jousting’ that leave the contestants bruised and battered, and regular old bike touring but with a much more DIY, cheap-or-no-cost flare that yuppies with their $4,000 bikes couldn’t hold a candle to.
For this guide we’ll be focusing on the travel aspect of bike punk culture, and that means bike touring. This form of travel involves using your bike to go long distances between cities. You carry your gear in ‘panniers’ or a bike trailer behind the bike and stealth camp where you can to avoid paying for expensive campsites and hotels.
Touring on a bicycle can be a great way to travel at a relaxed pace and is a great way to exercise. Since biking long distances doesn’t require much in the way of money (beyond initial setup and minor repairs) it’s an ideal way to travel on a limited budget. Over the course of this chapter we’ll look at how to get together the gear you need, and how to prepare for your first bike tour.
Buying a Bike
The adventures you have ahead of you could cover thousands of miles, so it’s important to choose the right kind of bicycle. You’ll want something comfortable, but durable, so you don’t regret your decision after the first day of riding. While these qualities are important, keep in mind that you don’t need an expensive super-bike that costs more than a used car. A lower-end used bike will generally perform just as well if you know what to look for.
Most brand new bikes in your average bike shop will start around $400. If you really enjoy bike touring, you might think about going a step up and getting a new high-end bike that will start around $600 and top out at $1200. This is the absolute limit I would consider for buying a brand new bike, and only if you need the extra features or durability that come with the cost. Anything more and you’re just going to end up paying too much money for features you don’t really need.
If even $400 sounds like too much money to you, don’t panic! These are the prices for new bikes. The real treasure trove of bicycles lies in the vast world of used bike listings. Whether you’re looking in your local newspaper, garage sale, Craigslist, or on eBay, there is going to be thousands of options available. Better yet, you’ll be able to get some of the exact same brands you’d see in the bike shop for a fraction of the cost. In fact, I usually budget no more than $200 for a quality bicycle completely capable of lasting through your average bike tour. Due to the plethora of used bikes available, this is going to be the best option for most of you.
Now I know some of you are going to say, ‘Hey, wait! What about those super cheap bikes from Walmart? They’re like, only a hundred bucks, brand new!” and while you would be right about their price, the sad truth of these bikes is that they are made very cheaply, with very low quality parts. They have a lot of plastic where there should be metal, and poor quality metal in many of the most important components, like the derailleur and brakes. These bikes will break very quickly, and were built to be cheap toys for kids that will eventually become bored of them. While there have been exceptions, your chances of completing even a short bike tour on a Walmart bike are very slim; even the steel frames of these bikes are known to come apart at the seams, causing nasty accidents when they do.
If you are just flat out broke and can’t see yourself even spending a hundred dollars on a bicycle, there is still hope! Many cities have community bike projects that you can visit; in an effort to promote cycling, these projects offer a community space to teach folks how to maintain their own bicycles. Most of these shops will even let you build your own bike from used parts they have lying around the garage. Your finished bike can be bought very cheaply, or paid for by volunteering a few hours of labor around the space. Even if you don’t know the first thing about bicycle maintenance, they will guide you through everything you need to know until you’re ready to hit the road with a recycled bike you put together all by yourself.
Types of Bikes
There are many different styles of bicycles out there, but for touring purposes, I’m going to cut to the chase and say that you want some kind of road bike. As the name implies, road bikes[For simplicity, I am lumping touring bikes in with road bikes since they are essentially the same, they just have more features geared specifically towards bike touring.] are built specifically for running on pavement, which is what you’ll be biking on about 90% of the time. These bikes have small, thin, high pressure tires designed for going fast on paved roads. They are also fully equipped with multiple chain rings for making hills easier to traverse, and have a full brake set for maximum stopping power. Ideally, any bike you are considering should have at least three rings in the front (where your pedals are attached) and as many as you can get in the rear. A lot of road bikes only have two rings in the front, which is okay, but more rings equal more gears, and having that third ring up front is going to be a huge help when going up steep hills.
Bikes that are poor choices for touring include mountain bikes, trikes, fixed gear bicycles, and any other slow moving bike that will make it difficult to cover as many miles a day as possible. Mountain bikes have fat tires and often front/rear shocks that are designed for going over extreme terrain, but they are slow, and usually lack a place to put a bike rack for storing gear. Trikes are three wheeled bikes that are great for stability and hauling goods, but are far too slow and lack the gearing required for hilly terrain.
Fixed gear bicycles are bikes that have a drive train with no freewheel mechanism. This means you cannot pedal the bike backwards while in forward motion like a freewheel bike does. Also, the pedals of the bike will always spin forward at the same speed the bike is currently going. The advantage is that these bikes don’t necessarily need brakes, since pushing backwards on the pedals will lock up the rear will and stop the bike by skidding it to a halt. Other perceived advantages are a lower overall bike weight, making for a faster bike.
Frankly, I think fixed gear bikes are ill suited to bike touring because they’re terrible at climbing hills. This is due to the fact that they have only one gear that you are forced to use no matter how much of an incline or decline you’re biking on. Road bikes have multiple gears to match whatever terrain you’re biking across. It’s important to keep in mind that when bike touring, you’re going to be going over a lot of hills.
One kind of bike I haven’t mentioned yet is the recumbent bike. These bikes are much different than most in that you sit down on an actual seat with back support, and the pedals are directly ahead of you instead of below. This makes for a very comfortable ride, which is great for long distances. They include all the standard gear you’d get on a road bike but also sit very close to the ground, which can make it difficult for drivers in vehicles to see you. This is why most recumbent bikers have a tall orange flag hanging off the back to alert drivers to their presence.
While I have no personal experience riding recumbent bicycles, I think they would be an excellent choice for long distance riding due to their comfort. If you can find a recumbent trike (three wheels instead of two) that would be even better as you wouldn’t have to maintain balance when coming to a stop. Unfortunately, the biggest drawback to recumbent bicycles is that they are almost always more expensive than your average road bike. While you can certainly find a used one for a good price, the cheapest new recumbent bike I’ve seen was around $600 and it looked pretty cheap in build quality.
In conclusion, I think it’s safe to say that for most of you reading this, the best kind of bike for your first time touring is almost always going to be a road bike. They’re easy to find, cheap, and a good one will get you safely to you destination with a great story to tell your friends.
Sizing a Bike
It’s important to choose a bike that fits you properly. If you ride a bike that is too large for you, you won’t be able to reach the pedals. A bike that is too small will force you to pedal with your legs coming up too high while you’re riding in the seat. This will obviously make for a very uncomfortable ride. Generally speaking, you want a bike that has a top tube (the length of metal that goes between the seat and the handlebars) to be around 2-3 centimeters below your crotch when you’re dismounted from the seat and have your feet flat on the ground.
The size of a bike is usually measured in centimeters, and this is the distance from the ground to the top tube when the bike is standing upright. You can measure this height by placing a book tightly under your crotch and measuring from the bottom of the spine to the ground. This is your inseam length, and the book gives enough space to give you your stand over height. When shopping for a bike you’ll use the stand over height to know if a bike is too big or small for your body.
Special Gear
The following is a list of gear you’ll need in order to travel via bicycle. These items should be brought along with you in addition to the gear we’ve already covered previously in the “What Should I Pack?” section of this book.
Route / Navigation
When it comes to actually navigating your route when bike touring, your best bet is going to be a small road atlas; while it’s certainly not necessary, it will definitely help to have a smart phone as well. I say this because (assuming you don’t have the ACA maps listed in the previous section) looking up your route via Google Maps is extremely helpful, especially when trying to plot a route that takes elevation into account. The Google Maps app has the option to display cycling directions and walking directions, but only the cycling directions take into account elevation when displaying the ‘easiest’ route. If you’re not interested in carrying technology with you on the road, I would encourage you to invest in the ACA maps as they will include this information and make your first few bike tours more enjoyable.
What is Bike Touring?
Bike punk is just the clever name we’ve given to bike culture as it relates to the punk rock community. Bike punk usually results in ‘mutant bikes’ put together by anarchistic welders, games like ‘bike jousting’ that leave the contestants bruised and battered, and regular old bike touring but with a much more DIY, cheap-or-no-cost flare that yuppies with their $4,000 bikes couldn’t hold a candle to.
For this guide we’ll be focusing on the travel aspect of bike punk culture, and that means bike touring. This form of travel involves using your bike to go long distances between cities. You carry your gear in ‘panniers’ or a bike trailer behind the bike and stealth camp where you can to avoid paying for expensive campsites and hotels.
Touring on a bicycle can be a great way to travel at a relaxed pace and is a great way to exercise. Since biking long distances doesn’t require much in the way of money (beyond initial setup and minor repairs) it’s an ideal way to travel on a limited budget. Over the course of this chapter we’ll look at how to get together the gear you need, and how to prepare for your first bike tour.
Buying a Bike
The adventures you have ahead of you could cover thousands of miles, so it’s important to choose the right kind of bicycle. You’ll want something comfortable, but durable, so you don’t regret your decision after the first day of riding. While these qualities are important, keep in mind that you don’t need an expensive super-bike that costs more than a used car. A lower-end used bike will generally perform just as well if you know what to look for.
Most brand new bikes in your average bike shop will start around $400. If you really enjoy bike touring, you might think about going a step up and getting a new high-end bike that will start around $600 and top out at $1200. This is the absolute limit I would consider for buying a brand new bike, and only if you need the extra features or durability that come with the cost. Anything more and you’re just going to end up paying too much money for features you don’t really need.
If even $400 sounds like too much money to you, don’t panic! These are the prices for new bikes. The real treasure trove of bicycles lies in the vast world of used bike listings. Whether you’re looking in your local newspaper, garage sale, Craigslist, or on eBay, there is going to be thousands of options available. Better yet, you’ll be able to get some of the exact same brands you’d see in the bike shop for a fraction of the cost. In fact, I usually budget no more than $200 for a quality bicycle completely capable of lasting through your average bike tour. Due to the plethora of used bikes available, this is going to be the best option for most of you.
Now I know some of you are going to say, ‘Hey, wait! What about those super cheap bikes from Walmart? They’re like, only a hundred bucks, brand new!” and while you would be right about their price, the sad truth of these bikes is that they are made very cheaply, with very low quality parts. They have a lot of plastic where there should be metal, and poor quality metal in many of the most important components, like the derailleur and brakes. These bikes will break very quickly, and were built to be cheap toys for kids that will eventually become bored of them. While there have been exceptions, your chances of completing even a short bike tour on a Walmart bike are very slim; even the steel frames of these bikes are known to come apart at the seams, causing nasty accidents when they do.
If you are just flat out broke and can’t see yourself even spending a hundred dollars on a bicycle, there is still hope! Many cities have community bike projects that you can visit; in an effort to promote cycling, these projects offer a community space to teach folks how to maintain their own bicycles. Most of these shops will even let you build your own bike from used parts they have lying around the garage. Your finished bike can be bought very cheaply, or paid for by volunteering a few hours of labor around the space. Even if you don’t know the first thing about bicycle maintenance, they will guide you through everything you need to know until you’re ready to hit the road with a recycled bike you put together all by yourself.
Types of Bikes
There are many different styles of bicycles out there, but for touring purposes, I’m going to cut to the chase and say that you want some kind of road bike. As the name implies, road bikes[For simplicity, I am lumping touring bikes in with road bikes since they are essentially the same, they just have more features geared specifically towards bike touring.] are built specifically for running on pavement, which is what you’ll be biking on about 90% of the time. These bikes have small, thin, high pressure tires designed for going fast on paved roads. They are also fully equipped with multiple chain rings for making hills easier to traverse, and have a full brake set for maximum stopping power. Ideally, any bike you are considering should have at least three rings in the front (where your pedals are attached) and as many as you can get in the rear. A lot of road bikes only have two rings in the front, which is okay, but more rings equal more gears, and having that third ring up front is going to be a huge help when going up steep hills.
Bikes that are poor choices for touring include mountain bikes, trikes, fixed gear bicycles, and any other slow moving bike that will make it difficult to cover as many miles a day as possible. Mountain bikes have fat tires and often front/rear shocks that are designed for going over extreme terrain, but they are slow, and usually lack a place to put a bike rack for storing gear. Trikes are three wheeled bikes that are great for stability and hauling goods, but are far too slow and lack the gearing required for hilly terrain.
Fixed gear bicycles are bikes that have a drive train with no freewheel mechanism. This means you cannot pedal the bike backwards while in forward motion like a freewheel bike does. Also, the pedals of the bike will always spin forward at the same speed the bike is currently going. The advantage is that these bikes don’t necessarily need brakes, since pushing backwards on the pedals will lock up the rear will and stop the bike by skidding it to a halt. Other perceived advantages are a lower overall bike weight, making for a faster bike.
Frankly, I think fixed gear bikes are ill suited to bike touring because they’re terrible at climbing hills. This is due to the fact that they have only one gear that you are forced to use no matter how much of an incline or decline you’re biking on. Road bikes have multiple gears to match whatever terrain you’re biking across. It’s important to keep in mind that when bike touring, you’re going to be going over a lot of hills.
One kind of bike I haven’t mentioned yet is the recumbent bike. These bikes are much different than most in that you sit down on an actual seat with back support, and the pedals are directly ahead of you instead of below. This makes for a very comfortable ride, which is great for long distances. They include all the standard gear you’d get on a road bike but also sit very close to the ground, which can make it difficult for drivers in vehicles to see you. This is why most recumbent bikers have a tall orange flag hanging off the back to alert drivers to their presence.
While I have no personal experience riding recumbent bicycles, I think they would be an excellent choice for long distance riding due to their comfort. If you can find a recumbent trike (three wheels instead of two) that would be even better as you wouldn’t have to maintain balance when coming to a stop. Unfortunately, the biggest drawback to recumbent bicycles is that they are almost always more expensive than your average road bike. While you can certainly find a used one for a good price, the cheapest new recumbent bike I’ve seen was around $600 and it looked pretty cheap in build quality.
In conclusion, I think it’s safe to say that for most of you reading this, the best kind of bike for your first time touring is almost always going to be a road bike. They’re easy to find, cheap, and a good one will get you safely to you destination with a great story to tell your friends.
Sizing a Bike
It’s important to choose a bike that fits you properly. If you ride a bike that is too large for you, you won’t be able to reach the pedals. A bike that is too small will force you to pedal with your legs coming up too high while you’re riding in the seat. This will obviously make for a very uncomfortable ride. Generally speaking, you want a bike that has a top tube (the length of metal that goes between the seat and the handlebars) to be around 2-3 centimeters below your crotch when you’re dismounted from the seat and have your feet flat on the ground.
The size of a bike is usually measured in centimeters, and this is the distance from the ground to the top tube when the bike is standing upright. You can measure this height by placing a book tightly under your crotch and measuring from the bottom of the spine to the ground. This is your inseam length, and the book gives enough space to give you your stand over height. When shopping for a bike you’ll use the stand over height to know if a bike is too big or small for your body.
Special Gear
The following is a list of gear you’ll need in order to travel via bicycle. These items should be brought along with you in addition to the gear we’ve already covered previously in the “What Should I Pack?” section of this book.
- Bike - We’ve already covered this in detail, but your bike should be comfortable, have functioning brakes and gears, and mounts for attaching bike racks to the front and back.
- Bike Helmet - Some people think these make you look like a dork, but a good helmet can literally save your life in an accident. Always wear a helmet when riding. Helmets can be bought fairly cheaply at thrift stores, but aren’t really all that much brand new either. Once a helmet is cracked, it’s no longer usable, so keep that in mind when looking at used ones.
- Saddlebags / Panniers - Panniers are just a fancy term for saddlebags that you can attach to your bike rack and use to carry your gear. If you go with this versus a trailer (see below) get at least four decent sized bags (two for the front, two for the back). There’s saddlebags made for handlebars and other smaller areas of the bike, and while these are handy, they’re also optional. I generally recommend panniers over a bike trailer since weight is distributed around the bike and it’s easier to maintain a fast momentum.
Panniers can be a bit expensive depending on the brand, so if you’re on an ultra-tight budget, you might consider creating your own saddlebags. There’s tons of instructions online, but most methods involve using bungee cords or something similar to attach five gallon plastic buckets (preferably the square kind) to your rear bike rack. Five gallon buckets of cat litter work perfectly for this (they’re usually square) and can be found for free by dumpstering your local Petco or asking your local cat lover.
- Bike Trailer - There are a lot of different brands of bike trailers, but really the only significant difference between them is whether the trailer has one wheel or two. This will be a matter of preference; some find using a one-wheel trailer prevents it from getting caught on curbs and whatnot (which can pull you to an abrupt and uncomfortable stop). Two wheels have a little more stability, and allow you to store more gear. Either option means dragging your gear behind you, and it’s worth noting that a decent bike trailer will almost always be more expensive than a set of panniers.
- Tires - Almost any kind of road tire will do as long as it’s in good shape. That said, if you have a little extra money, you can save yourself a lot of time and frustration by investing in nicer tires that have a Kevlar weave in them, which will stand up to sharp objects that would puncture weaker tires. Gatorskin and Armadillo brand tires are the most well known, and cost around fifty dollars per tire.
- Tire liners - I don’t see these mentioned often, but I’m a hardcore believer in using tire liners. These are plastic strips that go between the tire and the bicycle tube. This gives you another few millimeters of protection from sharp objects you might accidentally ride over. I’ve seriously gone from patching a tube once a week to patching one every six months with these installed, so I highly recommend using them. They’re also cheap ($10-15 for a pair) so there’s really no reason you shouldn’t at least give them a try.
- Bike Racks - These will be essential in carrying your gear around; otherwise you’ll be stuck putting all your gear on your back, and we don’t want that. Get whatever is cheap but won’t break under the weight of your gear. Make sure the back rack will fit into the mounts on your bike, and that the front rack won’t interfere with your brakes.
- Bike Lights - It’s likely you’ll be biking down some dark roads during your journey, so make sure to have good lights that will illuminate the road enough that you don’t collide with a branch or trip over a pothole. Also, some states (like Texas) will ticket you for not having lights on your bike at night, so front and rear lights are a must-have. I personally hate carrying around batteries, so try to get a set of lights that can be recharged via a USB cable.
- Bike Tool & Chain Breaker - You’ll need a way to repair most things on your bike, so invest in a good bike tool. A good bike tool should have every allen wrench you could need for making adjustments to your bike. You should always have a good quality chain breaker tool on hand in the event your chain breaks or needs to be disassembled/reassembled for some reason. Fortunately both of these tools can be bought for very little money (around $10-20 dollars).
- ACA Maps - If you’re going on an extended journey across the United States, you might consider purchasing these bike maps from the Adventure Cycling Association. They’re sold in sections or a complete set, depending on the trip you plan on taking. They can be a bit pricey at around seventy-five dollars for a whole route (i.e. The whole Pacific Coast) but are pretty useful. These maps include camp grounds, mileage, elevation, and specific warnings about certain sections of the route. They’re not necessary, but worth considering if you want to ensure a smooth trip.
- Rain Gear - Depending on the kind of enviornment you plan to encounter, it’s almost always a good idea to invest in some cheap rain gear to keep you from getting totally soaked while cycling. Rain gear can get quite expensive, but there’s almost always cheap version of the fancy stuff if you look around sporting goods stores or online. The trade off is that the more expensive the rain gear, the better it will breathe and let air flow through while keeping you dry. Cheapo rain gear can get quite stuffy and uncomfortable after a while, so keep that in mind. Fortunately you can find a decent rain jacket for around $15-25, and you don’t always have to buy rain pants if you don’t mind your lower half being occasionally soaked (in this situation, store valuables in your bags, not pockets).
- Camp Stove & Utensils - Eating nothing but cold food for weeks on end sounds kind of unpleasant, so I would strongly consider taking along a camp stove to make hot food with. This could be a fancy camp stove, or simply the DIY beer can stove discussed in the general gear section of this book. The GSI camping pots and pans also mentioned in that section are ideal for bike touring. Of course it’s a bit pricey, so you might want to just pack along a simple pot and utensils you have lying around some where.
Route / Navigation
When it comes to actually navigating your route when bike touring, your best bet is going to be a small road atlas; while it’s certainly not necessary, it will definitely help to have a smart phone as well. I say this because (assuming you don’t have the ACA maps listed in the previous section) looking up your route via Google Maps is extremely helpful, especially when trying to plot a route that takes elevation into account. The Google Maps app has the option to display cycling directions and walking directions, but only the cycling directions take into account elevation when displaying the ‘easiest’ route. If you’re not interested in carrying technology with you on the road, I would encourage you to invest in the ACA maps as they will include this information and make your first few bike tours more enjoyable.
Attachments
Last edited:
