Van build | Squat the Planet

Van build

lordnose

Active member
Joined
Apr 9, 2018
Messages
29
Reaction score
47
Location
london, United Kingdom
Yo, I'm building a van right now and thought if there was any interest I could share it with you guys. It's a beat up old Renault Master, and the plan is to travel Europe in once covid is done with. Part of my grand plan to ditch work and spend a while bumming around.

I'd get right to effort posting but thought I'd check to see if there's any interest first!
 

Attachments

  • IMG_20200227_191450_029_2.jpg
    IMG_20200227_191450_029_2.jpg
    197.9 KB · Views: 301

dprogram

Well-known member
Joined
May 31, 2011
Messages
619
Reaction score
372
Location
Riverdale Park, United States
Yo, I'm building a van right now and thought if there was any interest I could share it with you guys. It's a beat up old Renault Master, and the plan is to travel Europe in once covid is done with. Part of my grand plan to ditch work and spend a while bumming around.

I'd get right to effort posting but thought I'd check to see if there's any interest first!

Van builds are always welcome. Sharing knowledge is always good....so get to work because we'd all love to see it. Peace
 

dprogram

Well-known member
Joined
May 31, 2011
Messages
619
Reaction score
372
Location
Riverdale Park, United States
Van builds are always welcome. Sharing knowledge is always good....so get to work because we'd all love to see it. Peace
BTW I'm working on my my 2002 Ford E-150 again and tips are appreciated!
 

lordnose

Active member
Joined
Apr 9, 2018
Messages
29
Reaction score
47
Location
london, United Kingdom
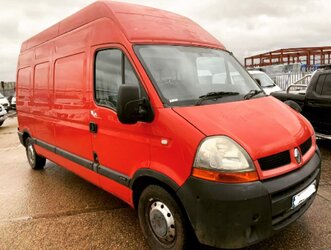
Cool, I'll get posting then. So the plan, with the absence of any real support for hitching hiking or any freight to ride in Europe, is it to build a cheapo but nice van to bum around in. I've fucking loved trains since I was a kid, and someday I'll bum around the US some more (I've family there so have spent quite a bit of time travelling on the west coast/in the desert) and get to ride one, but anyway, a van is the next best thing.

I'm gonna break it down rather than dumping everything so far into one big post.


The basic layout sketch looks something like this, with the bed being raised to around waist height allowing storage underneath.

meAyalHl.jpg


The cargo area of the van was super damp and dirty when I got it, pretty sure it's previous lives had been as an iron mongers van and then a landscapers van, so first order of business is to strip everything out and get it cleaned up.

XaDXKnO.jpg

6WXpsim.jpg


These photos do not accurately convey the smell of damp, rotting plants and petrol that was overwhelming while I ripped everything out the back, nor the amount of swearing it took.

After getting all the crap out I wiped everything down and got it as clean as it is ever gonna be. I was kind of hoping the existing ply floor would be in decent enough shape that I could build on top of it, not least because it was held in by a lot of rounded out/broken screws going straight through the vans floor.

(note pile of debris which entirely came of of nooks and crannys around the floor)
3FaXrmL.jpg


Alas, even after a few days of being left to air out the floor was pretty obviously rotten and soaked with petrol or something. Cue more swearing.

gJUa2nu.jpg


We've got a nice clean empty shell and no idea what the hell we're doing. And like I said, basically no corrosion on a 16 year old wagon. Mercedes and VW please take note.

Gonna call that good for the first post, although I've got quite a few more jobs done and will catch up to now over the next day or two.

Next up, building a raised insulated floor. Badly.
 
Last edited:

lordnose

Active member
Joined
Apr 9, 2018
Messages
29
Reaction score
47
Location
london, United Kingdom
The next job is building a raised insulated floor.

First I rattlecanned all the areas with damaged paint. No point leaving bare metal exposed. Then my plan was to lay down some 25mm/1" wooden beams, lay insulation between them and then screw 12mm/1/2" ply on top of that. Because of lockdown I had to order my timber online. The treated timbers I ordered to use as floor beams were incredibly warped, and rather than getting better timbers I pushed on which created a few issues.

Bz6C4UK.jpg


You can see how off the timbers are. My original plan to to glue the fuckers down, then lay the ply and screw it all down as one if necessary, but that turned out to be a total ballache because of how crooked some of these beams are.

Next mistake was using cheap polystyrene sheet insulation for the floor. I was thinking I wanted something rigid and that it didn't need an amazing rating due to heat rising, but holy shit it's the worst material I think I've ever worked with. Messy, fragile, shite.

WsB2esB.jpg


For some reason I don't have a picture of it with the ply laid before any other work was completed, could have sworn I took one but clearly not. All I have is a screencap from an insta story. Whatever.

Xt3rsRl.png


It was at that point I discovered that I needed to put quite a few screws through the ply and beams down into the sheet metal to hold everything flat. At some point I'm going to have to crawl underneath and seal all the screws, which will be a shit job.
 
  • Love It
Reactions: V4wandering

Matt Derrick

Retired Wanderer
Staff member
Joined
Aug 4, 2006
Messages
10,542
Reaction score
13,815
Location
Portland, OR
Website
youtube.com
Is this as far as you've gotten or just as far as you've published of your process? I'd really like to see this thread become a series as you go through your build, I think that would be super useful to a lot of people. In fact, I think it's worth adding to our best of featured threads section if you're into that :)
 

lordnose

Active member
Joined
Apr 9, 2018
Messages
29
Reaction score
47
Location
london, United Kingdom
I'm waaaay ahead of this point. I've got a build thread on another non-travel related forum, but I've been lurking here on and off for a while and thought 'these guys might enjoy this too!'

My plan is to get up to where I am now over the next few days or so, and then keep up to date as I do work. If you want to add it to the best of section that'd be cool mate for sure.
 

lordnose

Active member
Joined
Apr 9, 2018
Messages
29
Reaction score
47
Location
london, United Kingdom
Cutting a massive hole in the roof of a van, followed by drilling 24 holes for solar panels, is definitely going to rank as one of the more intimidating jobs of the build. It actually turned out to be pretty straightforward though.

You may notice that in some of the pictures there's a sneak peak of other stuff - these jobs are slightly out of order just cos I'm posting up all the finished jobs before moving on to stuff that's in progress or new init.

First up, cut a huge hole in the roof with a jigsaw:


uWiJbAM.jpg


The blade had gone kinda blunt by the end, but I just wanted to get it finished rather than climb back off the roof to get a fresh blade for the last 10cm of cutting. And yeah, those off brand monster energy stickers really need to come off.

By the way if you're cutting fibreglass do not unthinkingly brush the dust away with your hand. Itchy.

I'm using an inexpensive but well regarded rooflight from Fiamma. You can add a fan at a later date if needed but for now it's without - I may run a cable up there behind the cladding just in case. As you can see I have done a really neat and professional job of sealing it. I used a permanent sealant called CT1 rather than a standard silicone, working on the theory that if I ever need to remove the rooflight something has already gone pretty badly wrong. If I was building into a shiny 10 grand plus van I'd have used a removable sealant and spent time to do a neater job, but for this rolling scrapheap, whatever.

qx3M1RA.jpg


Also in the picture lined up ready for fitting are 2 of the 3x100 watt solar panels. Super pleased with how easy the solar was to fit with the Z brackets. Just chuck some more CT1 on the feet, drill pilot holes, screw in the self drilling screws and make sure everything's sealed.

NjLblci.jpg


300w of solar fixed, and the cable gland sealed on too. I'm just waiting for some link cables to arrive and they can all be connected up, just as soon as the battery is in the van.

Next up: internal finishing of the rooflight.
 

lordnose

Active member
Joined
Apr 9, 2018
Messages
29
Reaction score
47
Location
london, United Kingdom
Quick post about finishing up the interior of the rooflight.

One downside to the Fiamma rooflight I used it that the maximum roof thickness is around 40mm, and the height from my roof boards to the outside is something like 80 or 90mm. Result is that I've made a 25mm timber frame that sits inside the hole and which the rooflight is screwed into through the roof its self, then I've made a a frame to sit on top of that and surround the inner part of the rooflight. The roof boards can then be screwed directly into this giving a reasonably neat finish.

That pushes the thickness out to 80mm or whatever while giving a fairly neat finish.

The frame that the rooflight is screwed into. Note really shit quality timber. It's treated so not worried about the fact that it looks like it may have gotten damp at some point.

QSeVeLf.jpg


Dry fit of the inner frame.

r0LslYZ.jpg


And the whole thing mounted up with the inner rooflight offered up, although not fastened as yet.

xXJfBBi.jpg


In the next post we will start to cover building the wooden ribs inside the van for the boards to attach to, and the cladding its self.
 
  • Like
Reactions: dprogram

lordnose

Active member
Joined
Apr 9, 2018
Messages
29
Reaction score
47
Location
london, United Kingdom
I realised I don't have any photos of the bare ribs in the van so I've cobbled together what I can to show how it's done.

The basic idea is to have some 18x44mm timbers going from floor to where the fibreglass high top joins the metal body, which tongue and groove cladding will be screwed to, same repeated across the roof, then a frame across the back above the door and something a bit more improvisational to join the walls and ceiling together. The lining is all going to be 9mm tongue and groove cladding. Glad I chose these, they're cheap, super easy to work with and unlike ply don't require making super accurate long cuts across expensive boards. They seem to be really popular with #vanlife types and also travelling folk here in the UK because of their ease of use if you don't have a serious woodshop.

The insulation I'm using is made from recycled plastic bottles. Couple of big advantages to it:
  • Relatively inexpensive
  • Recycled
  • Totally non toxic to work with
  • Reasonable R value

No vapour barrier because honestly if 16 years of being a work van, including several as a constantly damp landscapers van, hasn't made it go rusty I don't think this will. And it's not like it's got another 10+ years of life left in it anyway, chances are - if it was a £20k van I'd consider it. Also it seems well effort.

My first idea was to do this, with the timbers running floor to ceiling, but it takes out a chunk of width plus the timber is under pretty serious stress.

BUQJvRl.jpg


So instead I cut them shorter, to the level of the high top, and cut shallow slots in them for flexibility. I ended up adding some standoffs in the middle of each rib to give them some more rigidity, but both ends are screwed directly into the metal.

CygJKWK.jpg


FxcSSNt.jpg


Df3Pakx.jpg


Made a frame to hide the void above the back door, which a couple of cladding boards will go over.

QK9dOtS.jpg


Then started chucking up some tongue and groove cladding boards to get a feel for the process.

GzAOhtY.jpg


Chucked up a wall and a half in a less than a day. Note also the ribs in the ceiling.

7JhidW9.jpg


Half the ceiling went up as well. Pretty pleased with how it's worked with the rooflight frame, although still needs sanding and finishing.

G578vje.jpg


MJcrTCI.jpg


Next goal was to finish the ceiling and run the conduits for the downlights and the solar cables. I also needed to remove half of that nice finished van because I changed my mind about how exactly I want to attach the bed frame and needed access to the vans structure.
 

Attachments

  • NjLblci.jpg
    NjLblci.jpg
    1.7 MB · Views: 237
  • qx3M1RA.jpg
    qx3M1RA.jpg
    1.3 MB · Views: 249
  • uWiJbAM.jpg
    uWiJbAM.jpg
    211.7 KB · Views: 226
Last edited:
  • Love It
Reactions: V4wandering

lordnose

Active member
Joined
Apr 9, 2018
Messages
29
Reaction score
47
Location
london, United Kingdom
Onto the rest of cladding. This was a pretty long process.

Ceiling and lighting cable conduits.

198RA76.jpg


Pleased with how this came out

TryFgiX.jpg


Then I changed my mind about how the bed would work, so started fitting that, as it needs to go through the cladding

First job was to remove half the cladding from the finished wall, frustratingly, and notch the cladding board underneath the beams for a tidy fit.

Owi3G9D.jpg


The beams are 2x3s, and are being attached to the frame of the van with an angle bracket one side screwed through to a block of scrap 2x3 the other side, which in turn is screwed into the frame. I didn't take a closeup picture of how that looks because I'd been working on it for 7 hours straight and was half crazed with hunger.

Then notched the cladding board to go above the beams.

P9FUUB6.jpg


Leaving me with the beams secured.

tQkZZ9H.jpg


Then both the walls go up leaving just the corners to do.

zukvnbr.jpg
 
  • Like
Reactions: ItsAWastelandBaby

lordnose

Active member
Joined
Apr 9, 2018
Messages
29
Reaction score
47
Location
london, United Kingdom
Figured out a good system for cladding the awkward top corners.

I've cut two wedges, the top one is attached with a couple of brackets in the fibreglass top, and the bottom is screwed straight through into the metal frame.

aTMBq4i.jpg


OQhPHOu.jpg


I had to add this bodge in to keep the join in the cladding in the same place.

RPflJlj.jpg


Also clad across the back. I like the idea of some storage there, but it made the junction of the side cladding and the back really awkward. I guess I'll try and still something on there at a later date.

oG838nC.jpg


I used a cool method I saw online where you build tape up around a corner to make a template for the curve. Already pulled it off the corner here but you get the idea.

wAlWUJ8.jpg


But check this shit out, proper pleased with it.

dX15Dq9.jpg


zNBBIhy.jpg


E9BbFvA.jpg


Cladding is finished!

mlh6euE.jpg
 

lordnose

Active member
Joined
Apr 9, 2018
Messages
29
Reaction score
47
Location
london, United Kingdom
Spent a few days finishing off the wheelarches, painting the floor in the storage area and oiling all the cladding.

Once I had two coats of the paint down I started cladding the wheel arch boxes and stuffed then full of insulation.

yxDnHVc.jpg


Buttoned up and oiled.

lDXcxml.jpg


Oiling the wood fucking sucked. I used Danish oil, brushed on thick then wiped off after 20 or 30 minutes. Got covered in the shit and my shoulder hurt from doing the ceiling.

E5Z43vd.jpg


Pretty happy with the result. Could do with a second coat but honestly fuck that. I can always do the visible bits later on, loads of this will be behind stuff anyway.
 

lordnose

Active member
Joined
Apr 9, 2018
Messages
29
Reaction score
47
Location
london, United Kingdom
Finished the bed platform. 12mm structural ply on the top.

kscF8YR.jpg


Clad the front with old pallet boards. I reckon it looks pretty good.

ACzf8Pm.jpg


Then fixed the water tank and started routing the filler and breather hose.

r93IaCC.jpg


5xne5E1.jpg


CI3gw4D.jpg


Not gonna lie its not the nicest work area in the garage space for doing the plumbing and wiring but at least I can sit up straight under there.

sJhkO18.jpg
 

lordnose

Active member
Joined
Apr 9, 2018
Messages
29
Reaction score
47
Location
london, United Kingdom
Built and painted a bulkhead from 12mm ply and 1x3s

1gXBybc.jpg


Then started on the furniture for the living space.

Kitchen.

xxHQFTu.jpg


Seat. Lid will be hinged once it's painted.

F4G0ZVv.jpg


And painted.

Excuse the slightly dingy pictures in the van, the light was fading.

xUShgM4.jpg


1x4jxlG.jpg
 

lordnose

Active member
Joined
Apr 9, 2018
Messages
29
Reaction score
47
Location
london, United Kingdom
Pretty pleased with this storage unit. Still got some bits of framing on the ends to box in once I decide how to do it - the pallet boards look great on the end but I don't think it's necessary on the other 3 vertical frames.

J4XUY5g.jpg


The holes for various electrical bits.

8M7FXAJ.jpg


With electrics fitted.

i91kntg.jpg


Solar controller remote, 12v and USB sockets underneath, gas and water knock off switches to the left and light switches above.

sjiMk7V.jpg
 

About us

  • Squat the Planet is the world's largest social network for misfit travelers. Join our community of do-it-yourself nomads and learn how to explore the world by any means necessary.

    More Info

Help us pay the bills!

Total amount
$10.00
Goal
$100.00

Latest Library Uploads