Toyota truck: a love affair (and repair) | Squat the Planet

Toyota truck: a love affair (and repair)

CaptainCassius

Well-known member
Joined
May 24, 2013
Messages
169
Reaction score
180
Location
Abroad, North America
So it is; that glorious time of year where I shall receive my return on the interest free loan I give the government every year in the form of excess taxes. Seeing as I have near 400,000 miles on this motor, and a bunch of other fun stuff I'd like to do to this rig in the form of maintenance and additions, I figured I'd catalog the shit storm of work that will ensue.

Will include an *almost* complete tear down of a 22re (removal and installation as well)

Axle and differential work

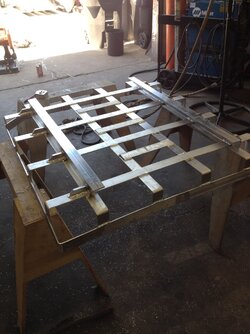
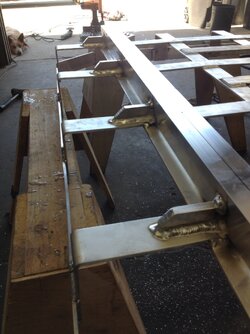
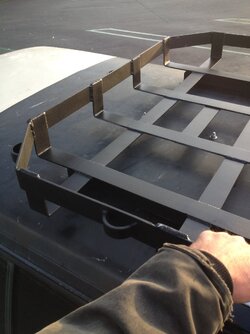
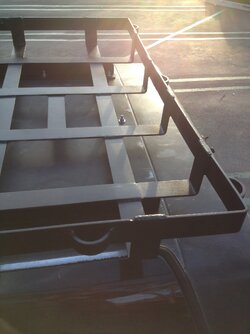
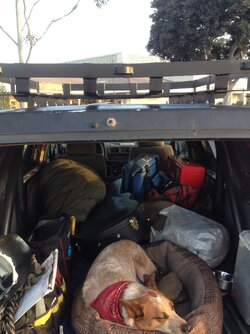
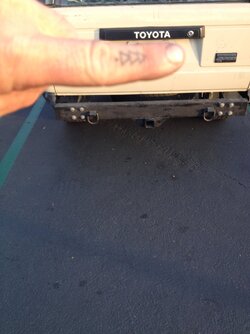
Misc. other shit like bumpers and roof rack builds

All with the goal of giving people ideas and hopefully some insight into mechanics. I'll be sure to include how to do things 'in the field' or without a proper shop and minimal tools if there is interest.

For the replacement motor I'm sourcing a takeout from a wrecking yard, hopefully something with low miles, and basically taking the long block and switching over all the accessories. This is probably the cheapest and easiest way to do it with minimal downtime compared to a rebuild of the original engine.

Quoted price on 22re takeout: $850 cash

This will be a work in progress and not necessarily in any particular order. My plan is to keep the vehicle in service almost the whole time with the exception of the day or two to swap the engines.

Ask questions

I'll try to take as many pictures as I can

Hope this will be useful.

Thanks.
 

Coywolf

Make America Freight Again
Staff member
Moderator
Joined
Dec 12, 2014
Messages
2,528
Reaction score
4,993
Location
Mormon Country
Website
www.youtube.com
I'd like to see this, as I am working on a '93 22RE at the moment, as well.

Good luck. I may be able to offer some help, as well, because I have done some work to mine.
 
  • Like
Reactions: CaptainCassius

CaptainCassius

Well-known member
Joined
May 24, 2013
Messages
169
Reaction score
180
Location
Abroad, North America
I'd like to see this, as I am working on a '93 22RE at the moment, as well.

Good luck. I may be able to offer some help, as well, because I have done some work to mine.

Let me know if you want any in depth breakdowns of components or anything. I'd be happy to go the extra step.

I hope there will be more people like you to benefit from this thread!
 
  • Like
Reactions: Coywolf

CaptainCassius

Well-known member
Joined
May 24, 2013
Messages
169
Reaction score
180
Location
Abroad, North America
Also I will cover engine tuning!

Timing

Idle speed

TPS adjustment

Etc.

If anyone wants me to include engine management system component checks I will.

If you have a carbureted model I can offer plenty of other info but unfortunately no pics.
 

CaptainCassius

Well-known member
Joined
May 24, 2013
Messages
169
Reaction score
180
Location
Abroad, North America
image.jpeg
image.jpeg
image.jpeg
image.jpeg
image.jpeg
image.jpeg
So here's the first installment: rear bumper/tow bar and some fabrication stuff.

I built the bumper itself a few weeks ago and didn't take any pictures of the fabrication process, but I needed to paint it and machine some spacers so I pulled it off today.

I flame-cut the old mounting brackets off the original bumper and welded a flange to them for bolting the actual bumper to.

Two reasons for bolting instead of welding:
1:makes it lighter by being able to install it in pieces
2: concentrates towing stresses to a flange with 4 grade 8 bolts, which is relatively low profile compared to welded gussets, and is just as tough.

The bumper itself is made of 3/16" mild steel flat bar, I had them shear it to my dimensions at the steel yard because it was only about $0.50 a cut and saves a lot of time cutting and deburring. Weld on shackles were about $5 a piece and the steel cost me about $30 with cuts included. The hitch receiver was salvaged off the old bumper.

Welded it together with 3/32" 7018 @ about 95 amps.
 
Last edited:
  • Sad
Reactions: Coywolf

Coywolf

Make America Freight Again
Staff member
Moderator
Joined
Dec 12, 2014
Messages
2,528
Reaction score
4,993
Location
Mormon Country
Website
www.youtube.com
Fuck ya, keep this coming. Great idea, bolts vs. Weld. Easier to modify down the line if needed.

What vehicle is this on, again?
 

CaptainCassius

Well-known member
Joined
May 24, 2013
Messages
169
Reaction score
180
Location
Abroad, North America
Next order of business:
I wanted to bring the bumper out a little farther from the body but being limited by the length of the old mounting brackets I needed some spacers.

This is made from a piece of 1.5"x4"x12" 6061 aluminum I picked up out of the steel yard scrap bin for around $20.

Easiest way to cut aluminum on the cheap is with a chop saw or skilsaw with a carbide tipped wood cutting blade with a high tooth count. They make blades specifically for aluminum but they're crazy expensive, and as you can see the surface finish of the cut is pretty nice with the cheaper (and more common) blade in the chop saw.

Normally you'll want to drill a pilot hole before running your final size drill; I'm not doing it here for two reasons:

1: tolerances aren't that critical in this situation
2: this is a big 3-phase powered drill press that doesn't give a rats ass what you put underneath it.

File-dressed the edges and a little surface finishing and voilà: we have some spacers.


image.jpeg
image.jpeg
image.jpeg
image.jpeg
image.jpeg
image.jpeg
 
Last edited:

CaptainCassius

Well-known member
Joined
May 24, 2013
Messages
169
Reaction score
180
Location
Abroad, North America
I've wanted a roof rack on this thing since I got it. Problem is the 1st generation of Toyota 4Runners have a fiberglass hard top much like a camper shell you'd put on a pickup. I've seen a lot of exoskeleton type racks to get around the issue of weight stressing the fiberglass which seems like a lot more work, weight, and cost than is necessary. The other common way is to compromise with a small gutter mounted rack over the cab, which just plain isn't the kind of room I want, plus I don't really trust the tiny fiberglass gutters on the hardtop so: I set out to make something else.

The basket is all aluminum

And: I added oak ribs on the underside of the roof for bracing

Ultra-light, and strong enough to hold some serious weight

Best part is it just bolts right into the roof.

This would be a great design for those of you with fiberglass camper shells on your vehicle as well.

More pics coming soon...
 

Attachments

  • image.jpeg
    image.jpeg
    564.1 KB · Views: 301
  • image.jpeg
    image.jpeg
    470.7 KB · Views: 293

CaptainCassius

Well-known member
Joined
May 24, 2013
Messages
169
Reaction score
180
Location
Abroad, North America
Here you can see its painted and mounted, oak ribs on the underside, cheap-o insulated headliner, and a finished pic of the bumper that I built.
 

Attachments

  • image.jpeg
    image.jpeg
    438.3 KB · Views: 294
  • image.jpeg
    image.jpeg
    460.7 KB · Views: 262
  • image.jpeg
    image.jpeg
    448.4 KB · Views: 266
  • image.jpeg
    image.jpeg
    573.1 KB · Views: 271
  • image.jpeg
    image.jpeg
    474.5 KB · Views: 255
  • image.jpeg
    image.jpeg
    439.5 KB · Views: 254

CaptainCassius

Well-known member
Joined
May 24, 2013
Messages
169
Reaction score
180
Location
Abroad, North America
Wheel bearing replacement/wheel hub breakdown

Same basic concept on FWD and RWD vehicles and trailers.

Note* you can see the damage on the thrust washer from the old wobbly bearing in exhibit #11

Removal:

Pic #1:wheel hub assembly, locking hub assembly, brake caliper assembly
Pic #2: steering knuckle, which, when unbolted, allows us to remove the brake caliper assy. And move it out of the way without disconnecting the brake line.
Pic#3: removing locking hub ferrules by lightly tapping with a hammer.
Pic#4:locking hub assy.
Pic#5:splined washer and axle retaining circlip (easiest way to remove is to slip a hook under the circlip in one of the splines, then pry between the washer and spindle to work the circlip open and slide off the axle)
Pic#6: setting the caliper out of the way
Pic#7: steering knuckle loose
Pic#8: removing the spindle lock nut
Pic#9: removing the star lock washer
(Then remove the last spindle nut and thrust washer)
Pic#10: prying out the old oil seal
Pic#11: thrust washer
image.jpeg
image.jpeg
image.jpeg
image.jpeg
image.jpeg
image.jpeg
image.jpeg
image.jpeg
image.jpeg
image.jpeg
image.jpeg
 

CaptainCassius

Well-known member
Joined
May 24, 2013
Messages
169
Reaction score
180
Location
Abroad, North America
image.jpeg
image.jpeg
image.jpeg
image.jpeg
image.jpeg
image.jpeg
image.jpeg
image.jpeg
image.jpeg
image.jpeg
image.jpeg
image.jpeg
image.jpeg
image.jpeg
image.jpeg
image.jpeg
image.jpeg
image.jpeg
Installation:
Clean your parts well to get rid of the old grease, then get silly with the grease (I prefer Lucas red n tacky)and make sure you *pack your wheel bearings with grease* you can do this by hand, look it up online but you MUST pack them, just dipping them in grease isn't enough.
Install the inboard bearing.
Tap in the new oil seal with a soft faced mallet or with a hammer and block of wood.
Install the outboard bearing and then remount the hub onto the spindle. *thrust washer goes first*
The first nut should be tightened down hard then back off til you can move it by hand and finger tighten essentially.
Lock washer goes on and bend a tab or two down on the nut then the locknut goes on and set it in fairly tight, then bend a tab up to lock that one.
Make sure the hub spins smoothly then continue installation reverse of removal.
 

About us

  • Squat the Planet is the world's largest social network for misfit travelers. Join our community of do-it-yourself nomads and learn how to explore the world by any means necessary.

    More Info

Help us pay the bills!

Total amount
$10.00
Goal
$100.00

Latest Library Uploads