Van build

Attachments

  • qB9YCfB.jpg
    qB9YCfB.jpg
    506.9 KB · Views: 532
  • IMDsNsh.jpg
    IMDsNsh.jpg
    153.1 KB · Views: 425
  • pEH3Kkn.jpg
    pEH3Kkn.jpg
    709.8 KB · Views: 513
  • JL2bo8m.jpg
    JL2bo8m.jpg
    656.9 KB · Views: 532
  • uSWDltC.jpg
    uSWDltC.jpg
    411.3 KB · Views: 507
  • UvElucE.jpg
    UvElucE.jpg
    801.7 KB · Views: 547
  • 2UAAqPq.jpg
    2UAAqPq.jpg
    683.1 KB · Views: 531
It's an OK job. Would have been better with more tools and knowledge but I think it's fine.

View attachment 56778

Now for a few coats of Danish oil before cutting the stove and sink holes. (bonus vegetable garden)

View attachment 56779

The stove cutout made and a dry fit to see if it's good enough.

View attachment 56780
 

Attachments

  • RdH1UIR.jpg
    RdH1UIR.jpg
    309.4 KB · Views: 488
  • u8IHjWa.jpg
    u8IHjWa.jpg
    831.2 KB · Views: 453
  • C67N5JV.jpg
    C67N5JV.jpg
    521.3 KB · Views: 441
Moved on to the gas fittings.

Cut the drop vent through the floor.

View attachment 56808

Rigged up the gas locker.

View attachment 56809

Made fire.

View attachment 56810

Checked it all with a gas detector and had to tighten a few fittings. Going to get it properly pressure tested also.

Then onto cupboard bottoms and wiring in the fridge.

Fridge is a Dometic 12v compressor model, pulls a few amps when it's running. It comes with a 12v cigarette plug, but I wanted it hidden away and it seemed to come lose constantly, so I cut the fucker off and hardwired it in.

View attachment 56811

View attachment 56812

Then on to the super awkward bottom panels. Nothing square, lots of cutouts.

View attachment 56813

View attachment 56814

Looks OK though.
 

Attachments

  • Vv17RlG.jpg
    Vv17RlG.jpg
    284.3 KB · Views: 459
  • yiJIMkb.jpg
    yiJIMkb.jpg
    278.9 KB · Views: 393
  • 48s6OER.jpg
    48s6OER.jpg
    261 KB · Views: 373
  • XNXuUyd.jpg
    XNXuUyd.jpg
    411.5 KB · Views: 452
  • lDVo2oW.jpg
    lDVo2oW.jpg
    402.1 KB · Views: 430
  • m30oeUe.jpg
    m30oeUe.jpg
    485.3 KB · Views: 391
  • W2Vhrbg.jpg
    W2Vhrbg.jpg
    785.9 KB · Views: 409
You have done a amazing job with your van. The dometic fridges are the greatest invention ever, make sure it has plenty of ventilation.
I tore out the interior of my van because I needed room to haul lumber and tools, plus a riding lawnmower. I miss have it ready for living in.
 
Thanks man, that's nice of you to say. I'm gonna see how the fridge gets on, if it needs more ventilation I'll cut a vent in the floor.
 

Attachments

  • 7e8ZtP7.jpg
    7e8ZtP7.jpg
    335.9 KB · Views: 427
  • MQTo6eI.jpg
    MQTo6eI.jpg
    393 KB · Views: 410
  • gIXhQVx.jpg
    gIXhQVx.jpg
    336.8 KB · Views: 424
  • rOT8X9t.jpg
    rOT8X9t.jpg
    282.2 KB · Views: 345
I haven't forgotten the thread, it's just been a slow week for progress. Expect a new update tomorrow or saturday!
 
Nice. I think Renault pulled out of the US market decades ago.
 
Yeah I don't think I've ever seen one in all the times I've been over there. In Europe they're one of the biggest van manufacturers, but unlike the Citroen I don't think it's rebadged and sold in the US at all.
 

Attachments

  • HIGYyoe.jpg
    HIGYyoe.jpg
    655.7 KB · Views: 377
  • v0IwwfF.jpg
    v0IwwfF.jpg
    83.5 KB · Views: 381
  • CPeRr5D.jpg
    CPeRr5D.jpg
    424.8 KB · Views: 386
  • 6Gj71P1.jpg
    6Gj71P1.jpg
    868.9 KB · Views: 370
  • LEXgHBK.jpg
    LEXgHBK.jpg
    337 KB · Views: 393
It's been a slow week because the power on the road I live on all went out and blew up half my stuff, but I did make a couple of important bits of progress.

To view this content we will need your consent to set third party cookies.
For more detailed information, see our cookies page.
 
Apologies for slower updating, had to get a job to tide me over during covid so not working on it as much.

Pretty pleased how these doors handles came out though.

View attachment 56977
 

Attachments

  • YQPHrdm.jpg
    YQPHrdm.jpg
    648.1 KB · Views: 357
Just read this entire thread in one sitting. My dog, what a great build. Well done and thanks for the effort of putting all this together. I hope there will be more to come.
 
Don't worry, I've not forgotten the thread, I've just been working and only making slow progress. I'll post an update over this weekend!
 
Better a week late than never...

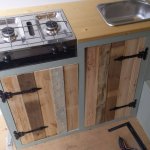
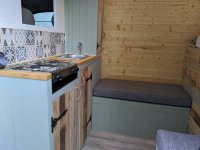
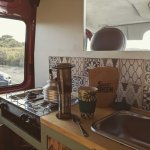
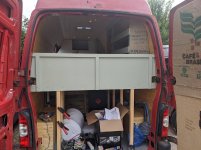
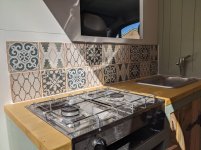
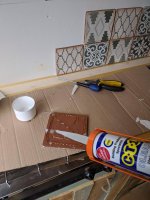
Fitted tiling above the kitchen. Decided to use CT1 rather than tile adhesive cos the bulkhead flexes a little and I don't want them falling off.

View attachment 57608

Looks pretty good.

View attachment 57609

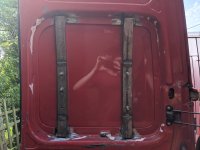
Got the bracing welded in for the spare finally.

View attachment 57610


Bit of cheapo rattle can.

View attachment 57611

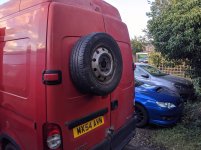
Bolted the carrier back up and for reasons lost on me 2 of the bolts cross threaded half way down the bolt, so I had to cut two m10 stainless bolts out. Absolute pain in the arse.

View attachment 57612

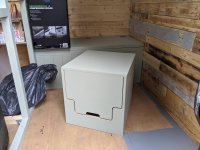
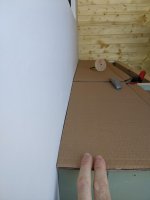
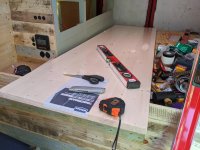
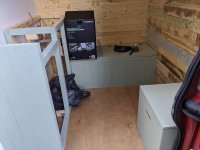
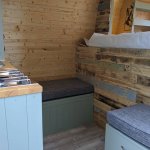
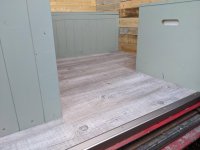
Then moved on to the floor - I bought some cheap self adhesive lvt online. I was quite apprehensive about laying it but it went down super easy in an hour or so.

View attachment 57613

View attachment 57614

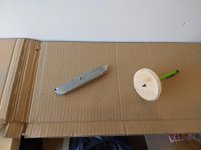
Fully stabbed myself in the finger with a brand new blade in Stan during the process, but fortunately most the blood went under where the floor now is, and the 2 or 3 splatters on other stuff should wipe off.

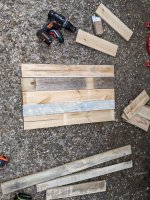
Headboard on the bed. I only have a shot from the back. I've not detailed the process but by this point we all know it's some PSE timber screwed to ply and painted with green emulsion.
View attachment 57615

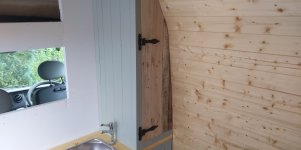
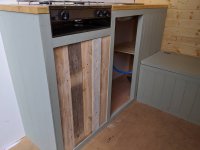
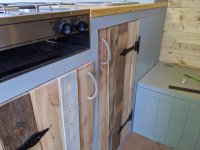
Also got the panel on the bottom of the sliding door.
View attachment 57616

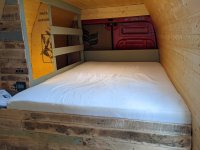
And the cushions + mattress arrived.
View attachment 57617

Excuse the mattress sticking up, I didn't want to shove it into the space until it had finished expanding. It'll only stick up a few cm above that top board when it's fully seated.
View attachment 57618

Mattress fully expanded and in place.

View attachment 57619

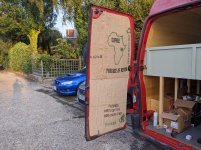
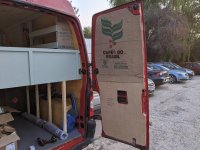
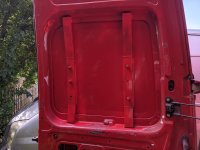
And lined the back doors with some recycled coffee sacks.

View attachment 57620

View attachment 57621

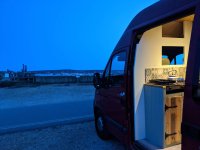
And to top it off we took the van out for a night finally for a shakedown run.

View attachment 57622

View attachment 57623

View attachment 57624
 

Attachments

  • qGhlDRH.jpg
    qGhlDRH.jpg
    508.7 KB · Views: 351
  • G1lqprQ.jpg
    G1lqprQ.jpg
    94.4 KB · Views: 282
  • NkbjUlu.jpg
    NkbjUlu.jpg
    447.8 KB · Views: 332
  • d5BqYlV.jpg
    d5BqYlV.jpg
    987.4 KB · Views: 429
  • 3VCCCgp.jpg
    3VCCCgp.jpg
    884.1 KB · Views: 396
  • yQsyzvN.jpg
    yQsyzvN.jpg
    409.4 KB · Views: 339
  • XlCRe9z.jpg
    XlCRe9z.jpg
    198 KB · Views: 381
  • UTYsWQh.jpg
    UTYsWQh.jpg
    418.6 KB · Views: 322
  • zPvMvRb.jpg
    zPvMvRb.jpg
    664.9 KB · Views: 351
  • ySNjFZ4.jpg
    ySNjFZ4.jpg
    619.9 KB · Views: 333
  • yDeMX4L.jpg
    yDeMX4L.jpg
    685.3 KB · Views: 354
  • srd8G7B.jpg
    srd8G7B.jpg
    734.7 KB · Views: 335
  • p8uYn9O.jpg
    p8uYn9O.jpg
    413.4 KB · Views: 292
  • aSlMfLw.jpg
    aSlMfLw.jpg
    414.2 KB · Views: 297
  • WRK0P1s.jpg
    WRK0P1s.jpg
    794.9 KB · Views: 330
  • geeYihX.jpg
    geeYihX.jpg
    430.9 KB · Views: 363
  • QfsF3B9.jpg
    QfsF3B9.jpg
    447 KB · Views: 352
Man, that thing is really looking great. How did it do on your overnighter?
 
Yeah pretty good actually. Main issue was that I need to sort out some kind of blind for the side window at night to keep it a bit stealthier, and a couple of super minor things like door catches not quite working. It's pretty much ready for serious long term travel at this point, but I think I'm probably stuck working until covid comes to an end sadly.
 
Back
Top